Gorgias AI Chatbot - Automate 95 % of Your Customer Conversations
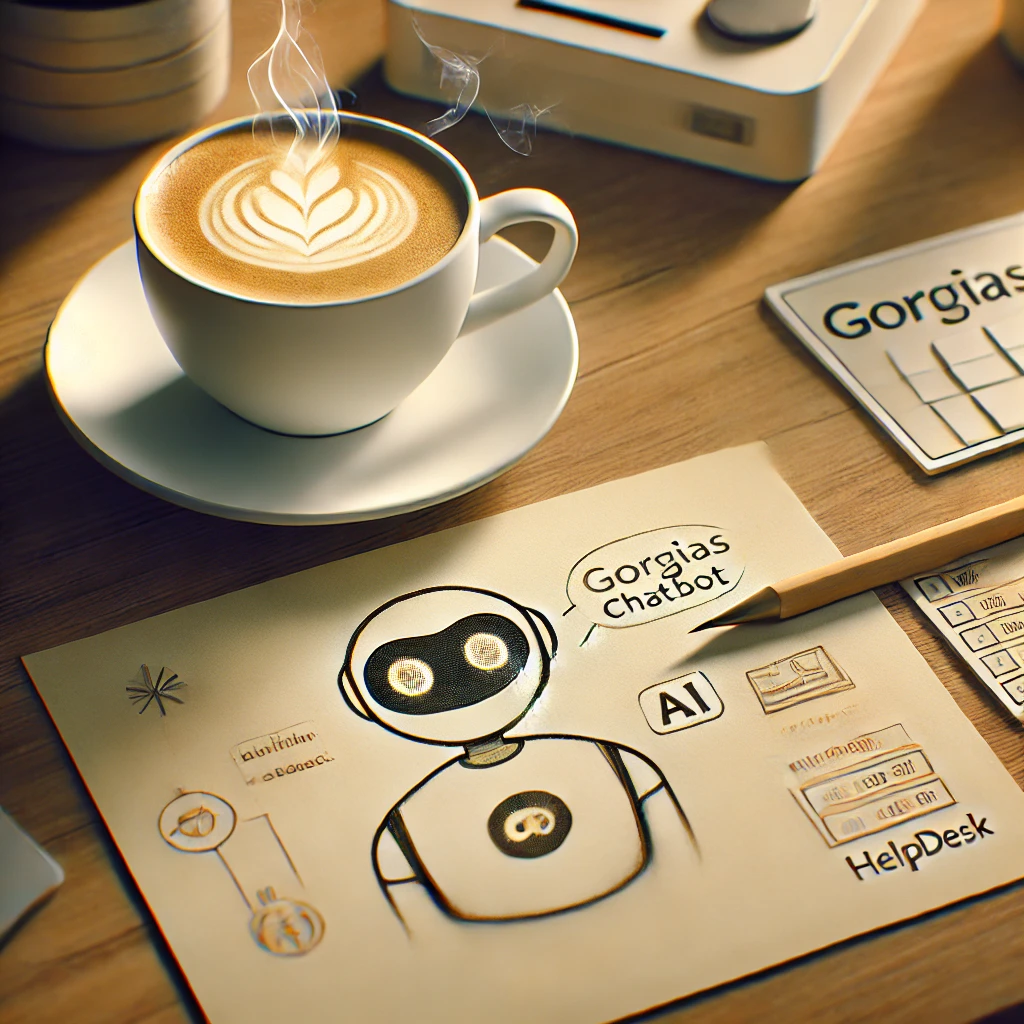
Great customer support is essential for every business. Fast and accurate responses are at the heart of this service, and AI chatbots are the technology that can deliver on that promise.
In this article, we’ll guide you through the process of integration such a chatbot into your Gorgias workflow.
But first, let’s quickly highlight the key benefits of using a chatbot:
- ⏳Faster response times
- 🤖Accurate answers
- 🕧24/7 availability
- 💰Reduced support costs
For a deeper dive into how chatbots can revolutionize your e-commerce business, check out the article on the benefits of e-commerce chatbots.
Gorgias
Gorgias is a powerful helpdesk designed specifically for e-commerces. It streamlines customer interactions across multiple channels, provides in-depth reporting, and integrates with 3rd party tools. This allows you to connect AI chatbots like Amio.
Amio
Amio is a GPT-powered chatbot platform tailored for e-commerces. It offers multi-language support, omnichannel messaging, and ERP/E-commerce platform integrations for order tracking. It empowers businesses to deliver smart and efficient customer service
Step-by-Step Guide
Step 1: Prepare Accounts
- Sign Up/Log In: Ensure you have active accounts on both Gorgias and Amio.
Step 2: Create Amio AI Chatbot
To easily create an AI chatbot using Amio's template library, follow these steps:
- Go to Settings.
- Click the Add button.
- Name your bot.
- Select a template that suits your needs.
- Click Create.
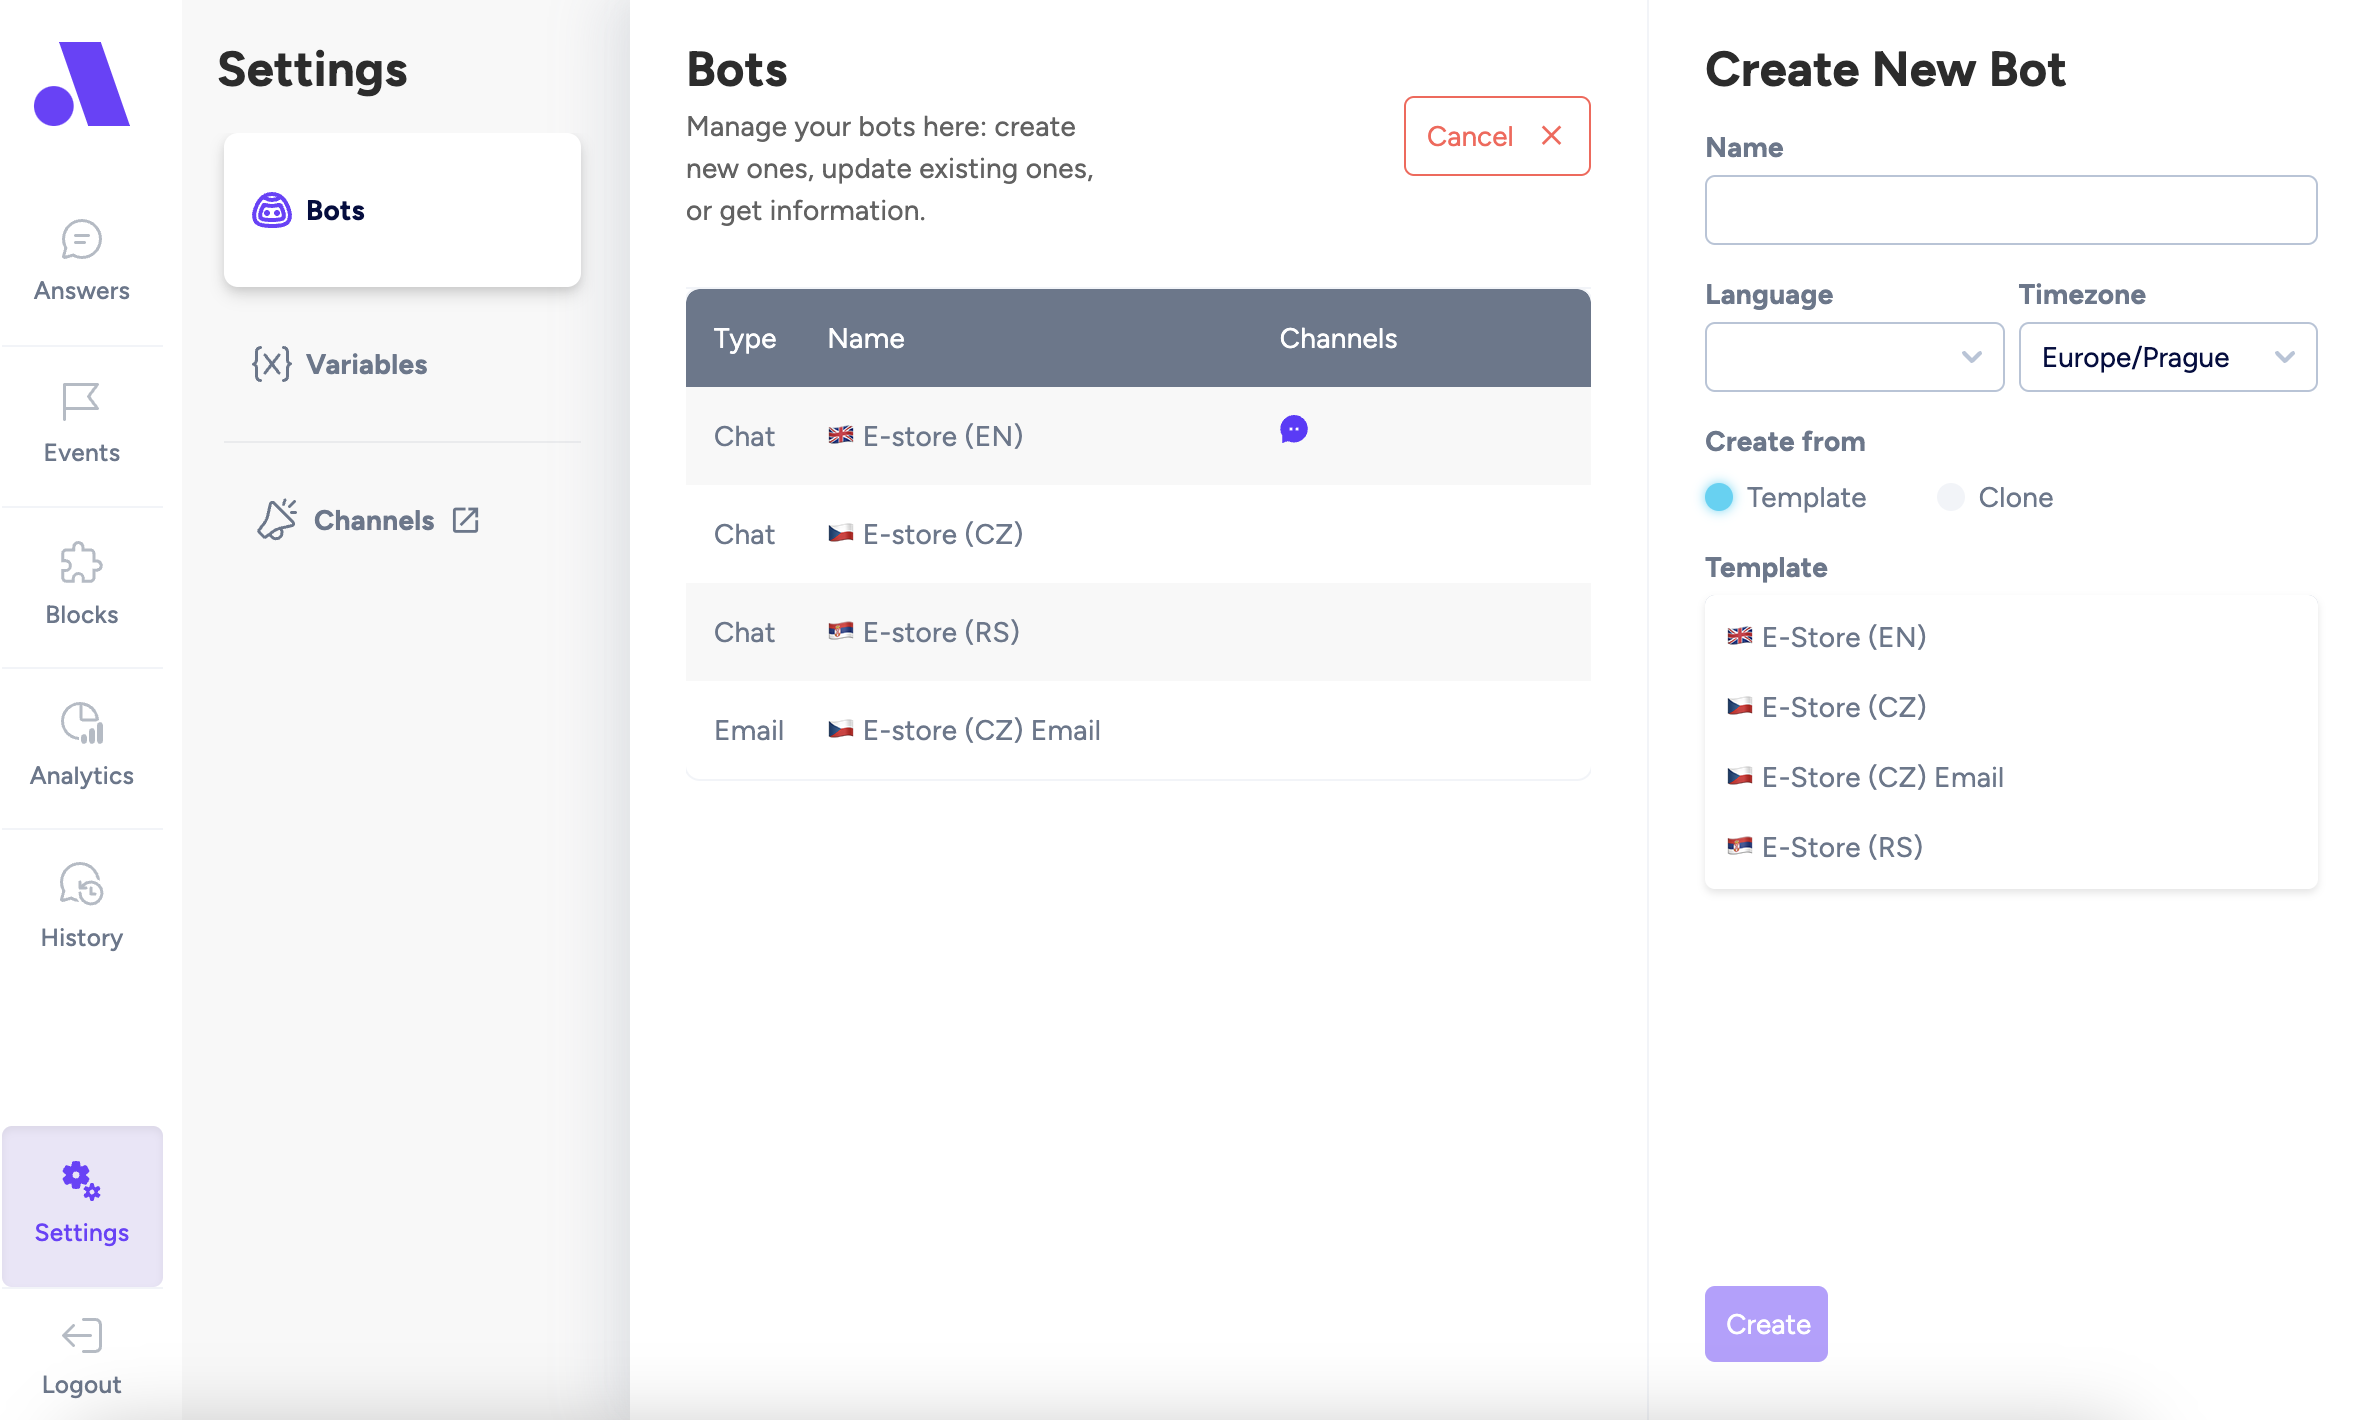
If you want to customize it further, follow our step-by-step guide to set all the properties.
Step 3: Get the Amio channel id
To set up the integration between the AI chatbot and the helpdesk, you need to identify the Channel ID of the Amio chat that will be connected to Gorgias. Here's how you can do that:
- Access Amio Administration:
- Go to Amio Administration.
- Find the Channel:
- In the list of channels displayed, locate the specific Amio chat channel you want to integrate with the helpdesk.
- Copy the Channel ID:
- Once you've found the correct channel, look for the Channel ID in the table.
- Copy the Channel ID from the table.

Step 4: Set Up Support email in Gorgias

- Click on the gear icon or "Settings" in the main navigation menu.
- In the Settings menu, find and click on "Email."
- Click on "Add Email Address" on the top right corner.
- Provide the email address you want to use for support. This can be a new email address or an existing one.
- Follow the prompts to configure your email settings, such as selecting your email provider (e.g., Gmail, Outlook) and authorizing Gorgias to access your email account.
- If you are using an existing email address, you might need to set up email forwarding. Follow the provided instructions to forward emails from your existing support email to the Gorgias email address.
- Send a test email to ensure everything is set up correctly and that emails are appearing in your Gorgias dashboard.
Step 5: Connect Amio AI chatbot with Gorgias
Integration with an AI chatbot and a helpdesk system like Gorgias enables efficient customer service. Here's how it works:
- AI Chatbot Handling: The AI chatbot manages around 95% of customer inquiries autonomously. It addresses common questions, processes requests, and provides instant support, significantly reducing the workload on human agents.
- Helpdesk Integration: For more complex or specific issues that the AI cannot resolve, the chatbot escalates the case to Gorgias. There are two integration options
- Live Connect (Universal Connector): This option allows real-time transfer of the conversation to a live agent in Gorgias. It's ideal for situations requiring immediate human intervention.
- Email Fallback: This option forwards unresolved issues to Gorgias via email. It's less time-sensitive and can be suitable for less urgent matters.
This system ensures that most customer needs are met quickly, while more complicated issues are efficiently managed by Gorgias.
Step 6: Enable integration
Once you've set up an email in Gorgias and obtained the Channel ID from Amio, you're ready to enable the integration. The final step of the integration remains, which can be completed either by you or by an Amio success manager:
- Ask Amio Success Manager at support@amio.io
- Or Send a POST request:
- Create a POST request (i.e. through Postman)
- Paste this as the URL: https://api.amio.io/internal/integrations
- Paste this boilerplate into body (body ⇒ raw ⇒ JSON) and then replace the values with your own data:
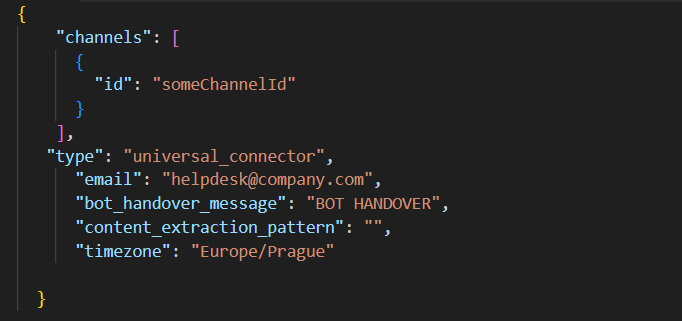
- email - email address where the conversation will be sent to during handover
- bot_handover_message - message text which will trigger handover to bot (Chat Ended event) when received. The message must be sent by operator and start with this exact string in order to trigger handover.
- content_extraction_pattern - (optional) regex to extract message text from email body. Helpdesks usually add a lot of other text around, like time and date and signature at the end. The regex must have 1 capturing group which contains the desired part of the message. (use regex101.com to test it. It's usually necessary to use non-greedy quantifiers .*? to avoid repeating patterns). The regex will be evaluated with the s flag (single-line, dot matches whitespace)
- timezone - timezone name. Used for date/time formatting
This process is quick and typically takes less than a minute to complete. Once enabled, the integration will be active, allowing seamless communication between the AI chatbot and Gorgias.
Step 7: Testing and Optimization
Before finalizing the integration, ensure that your AI Chatbot is set up exactly as you want it. To help with this, refer to our detailed guide:
- Set Up Your AI Chatbot:
- Make sure your AI chatbot is configured to handle customer inquiries effectively.
- If you need guidance, check out our article How to Add an AI Chatbot to Shopify: A Complete Guide (Set up your AI Chatbot chapter) for step-by-step instructions.
This guide will walk you through everything you need to ensure your chatbot is properly set up and ready to be integrated with Gorgias.
To tailor the user interface (UI) of your AI Chatbot to meet your specific needs, you'll want to explore all the available customization options. Here's how:
- UI Customization:
- You can adjust the chatbot's appearance and behavior by using the customization options available in the window.amioWebchat.init() function.
- This function provides various settings that allow you to modify elements like colors, fonts, chat window size, positioning, and more.
By checking out all the available customization settings within window.amioWebchat.init(), you can ensure that your chatbot's UI aligns perfectly with your brand's style and user experience goals.
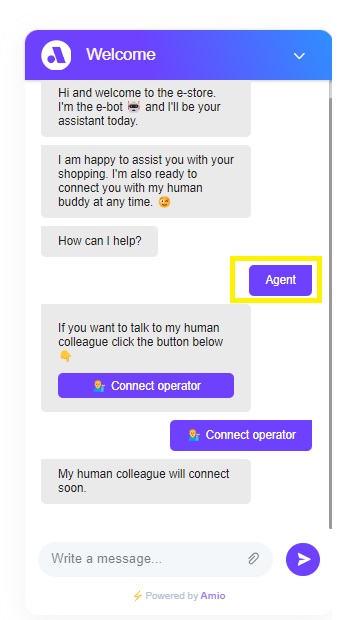
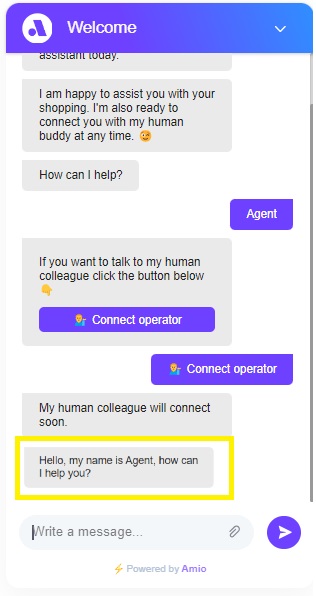
- Test handover to Agent:
- Open the chat which was integrated above
- Call for agent
- Find the conversation in Unassign tickets in Gorgias
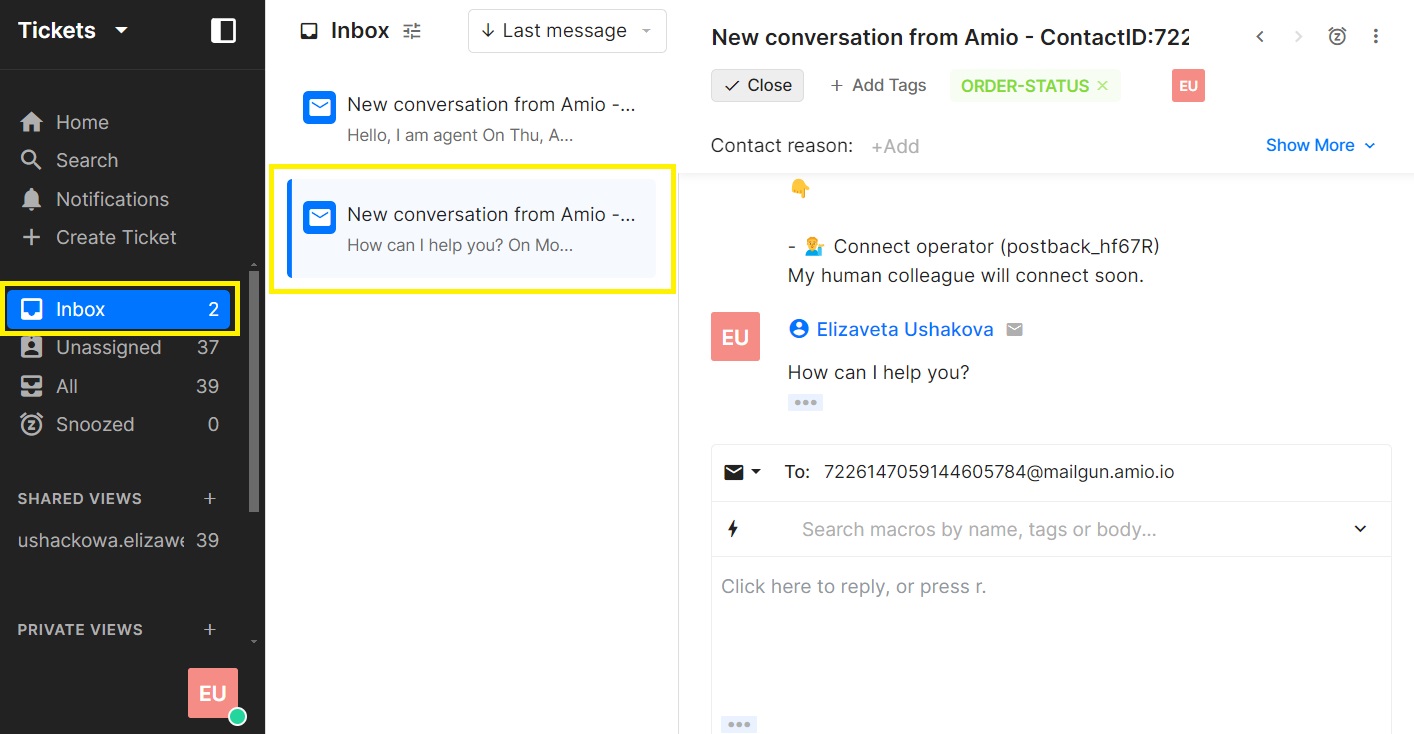
- Chat with your customer
Conclusion
To maximize the effectiveness of your AI chatbot, it's crucial to continuously refine its capabilities:
- Utilize Amio Analytics: Regularly review analytics provided by Amio to gain insights into common customer inquiries and interactions. Use this data to adjust and enhance predefined answers, ensuring they are aligned with customer needs.

- Optimize GPT Prompts: Continuously improve the GPT prompts to make responses more accurate, relevant, and helpful. Tailor prompts based on real-world usage and feedback to keep the chatbot performing at its best.
Ready to transform your customer support with the power of AI? Experience firsthand how integrating Gorgias with Amio can elevate your service quality and efficiency. Book a demo with Amio and discover the benefits of personalized, 24/7 customer support.
Book a 30-minute session where we will find out how AI bot can help you decrease call center costs, increase online conversion, and improve customer experience.
Book a demo