How to Add an AI Chatbot to Shopify: A Complete Guide
AI chatbots are crucial for modern e-commerce, and GPT chatbots are among the best models to be used. They excel at understanding and responding to customer questions, making them ideal for Shopify stores.
Why Use GPT Chatbots with Shopify?
- Better Customer Support: Instant, accurate responses improve customer satisfaction.
- Always Available: Chatbots work 24/7, handling queries anytime.
- Handle More Customers: Chatbots can manage multiple conversations at once, perfect for busy periods.
- Personalized Recommendations: AI can suggest products based on customer needs.
Stay Competitive with AI
Using AI across your e-commerce operations is vital. Those who don't adopt AI risk falling behind competitors who offer better customer experiences and more efficient operations.
What This Guide Covers
This guide will show you how to use a GPT chatbot for customer service on Shopify. By the end, you'll be able to set up and integrate an AI chatbot into your Shopify store, enhancing customer service and boosting sales.
Understanding AI Chatbots
AI chatbots are highly effective in e-commerce for improving customer interaction and support. To maximize their potential, it's crucial to understand their functionality and specific applications in an online store.
Predefined Answers and AI-Generated Answers
- Predefined Answers: scripted responses for common questions, ensuring consistency and accuracy. Ideal for after-sales queries like order status and return policies.
- AI-Generated Answers: on-the-fly responses generated by AI, handling complex or unique queries. Best for pre-sales questions such as product recommendations and details.
Knowledge Base Integration
AI chatbots can pull information from a knowledge base, which includes:
- Static Websites Content: Information from your website, such as FAQs, blog posts, or help articles.
- Product Feeds: Data from your product catalog, helping the chatbot provide detailed product information and recommendations.
Handover to Live Agents
For complex queries, the chatbot can hand over the conversation to a live agent through:
- Shopify Inbox: direct queries to your Shopify support team inbox.
- 3rd Party Help Desks: integrate with external help desk software.
- Email: send conversation and customer’s details to your support email for follow-up.
- Transfer to Messenger: continue conversations on platforms like WhatsApp, Messenger, or Telegram after the customer closes the browser.
By understanding these basics, you'll see how AI chatbots can enhance your Shopify store's customer support without compromising on customer experience.
Set up your AI Chatbot
Among the many AI chatbot platforms, this guide focuses on the Amio platform, designed specifically for e-commerce. Amio includes essential features crucial for running an AI chatbot on your e-shop.
1. Adjust Predefined Answers
After creating an Amio account, you'll receive an e-commerce template chatbot. Activate the questions you want covered with predefined answers and modify them to match your e-shop's style.

Don’t forget to reflect your style of communication, tone of voice, and copy-write. Here are a few tips to consider:
- Use short answers.
- If they are too long, use buttons to make them structured.
- Ensure the answers are easy to understand.
- Provide the necessary information.
- Use the same copy-write, you have on social media.
- Consider using emojis.
2. Product Feeds
Integrating product feeds allows your chatbot to provide detailed information about your products. You can use the very same product feed you have for Google Merchant or even add additional information. Think about what the chatbot should know to help customers with their product selection.
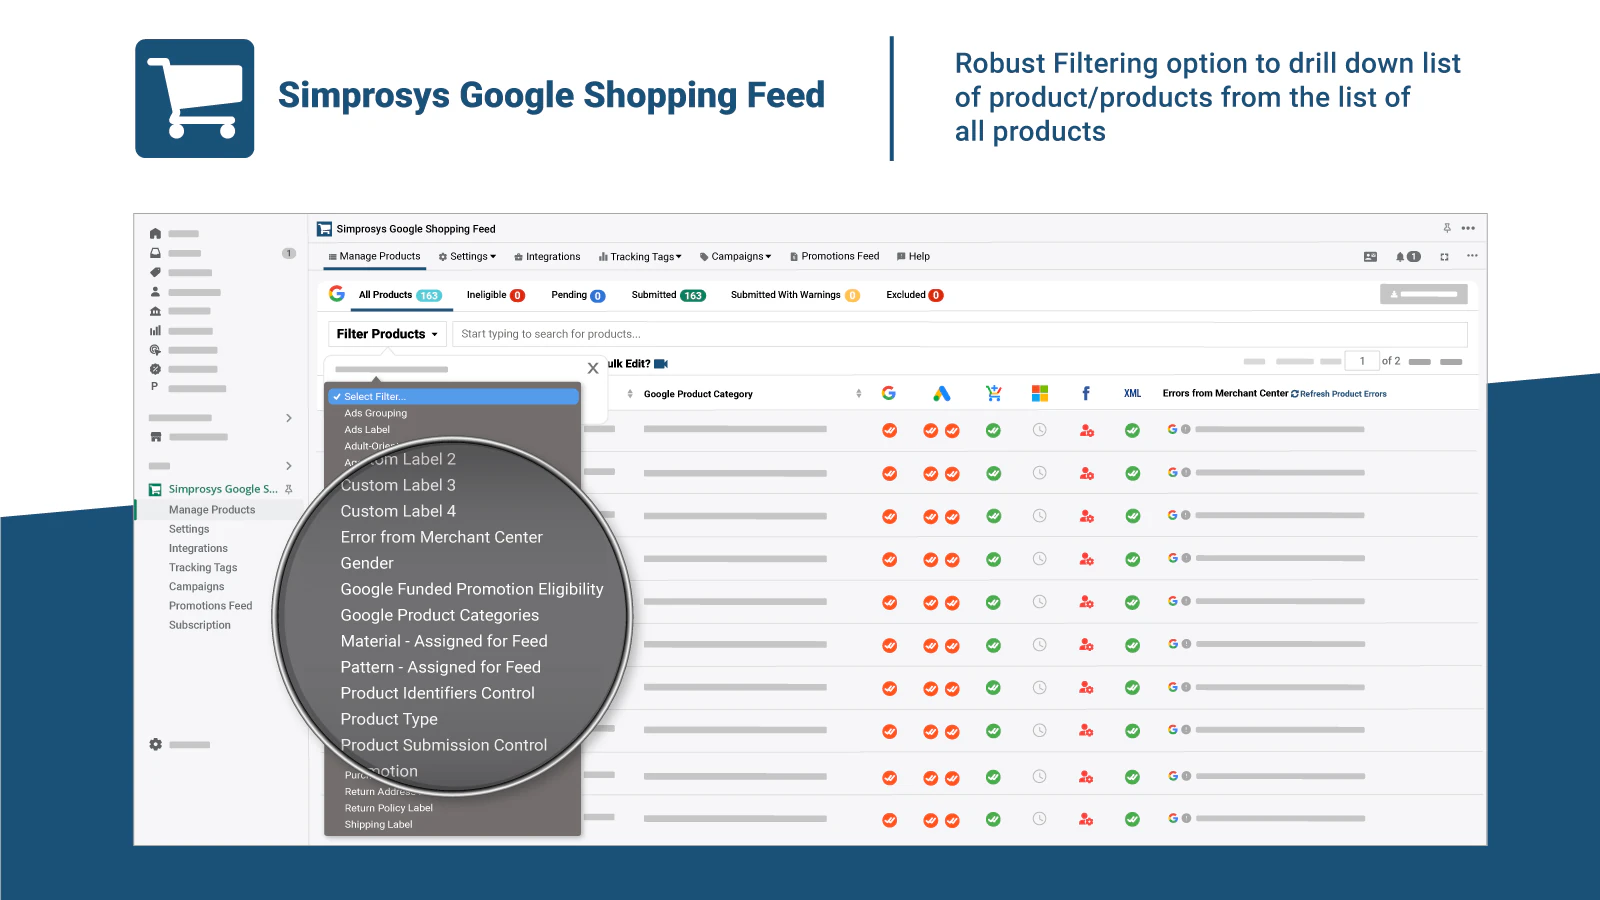
- Get the Shopify Product Feed: Simprosys is one of the most widely used Shopify apps for product feeds.
- Add all necessary information: The bare minimum is product name, description, price, and availability.
- Export XML Product Feed: Get the XML product feed URL.
- Load the Feed to Amio: In chatbot settings, import the XML feed into the Amio chatbot platform. This enables the chatbot to access and provide up-to-date product information.
3. Static Information
Static information might include any additional information the chatbot should be aware of. Typically, it is FAQs, terms of services, contact websites, blog articles, etc.
- Select Relevant Pages: Identify the static pages on your website that contain important information.
- Export them to PDF: Just print the website's content to PDF.
- Add them to the Amio knowledge base: Upload these pages into the Amio in the chatbot settings section.
4. Define the Prompt
The prompt is an instruction set that will be followed when generating the answers. Creating an effective prompt helps guide the chatbot to provide the best possible responses.
Example prompt:
You're an AI assistant at the ${variable.estore-en-url} call center. Your name is ${variable.chatbot-name}. You help customers answer questions.
You have been provided with documents in the English language (XML feeds, PDFs, etc.). Please read this information carefully before answering the question.

Follow this:
- Answer in English.
- If someone asks for a price, state the price including VAT.
- When answering, use the masculine gender.
- Don't thank the customer for asking a question.
- If you are missing any information from the customer, ask for complete information.
- Do not mention that the customer should contact someone.
- Do not refer the customer outside the ${variable.estore-en-url} domain.
- Do not refer the customer to the manufacturer's site.
- Don't talk about the competition.
- Only talk about the products that have been provided to you.
- If you mention a product, always include a link (URL) if you know it.
- If you provide any link, append UTM parameters as follows utm_source=${variable.utm_source}&utm_medium=${variable.utm_medium}&utm_campaign=${variable.utm_campaign}
- There may be a lot of information missing in the information provided, if something is missing, use publicly available knowledge.
- Don't say you'll arrange something, or take care of something, or give someone a message.

Use this copy-write for your answer:
- Write short answers of up to 500 characters.
- Structure the text in paragraphs or bullet points.
- Tell customers.
- Use emoji more often - your customers are mostly teenagers.
5. Set up Handover to Live Agent
For queries that the chatbot cannot handle, it's essential to have a smooth handover process to live agents.
- Help-desk Integration: Set up the help desk in the Amio settings where the customers will be handed over.
- Shopify Inbox: Use Amio e-mail live handover integration for the help desk not provided in the settings. It will transfer customers' chats into the live agent’s e-mail and back for the life communication.
- Email Integration: As far as most of the conversation will be handled by the chatbot. You can rely on e-mail fallback (moving the conversation from chat to email) for cases where human assistance is needed.
Add AI Chatbot to Shopify Store
To integrate the Amio AI chatbot into your Shopify store, you first need to customize the visual side of the chat widget.
1. Adjust Webchat Branding
To align the chatbot with your e-shop's branding:
- Access Amio Chatbot Settings:
- Go to Settings > Bots in your Amio account.
- Copy the webchat code on the top right corner “Copy chat widget code”.
- Customize the Widget:
Use the available parameters to adjust branding, behavior, font, etc. Refer to the Amio Chat Widget Branding for detailed customization options.
Example javascript code:
<script type="text/javascript">
window.amioWebchat.init({
  channelId: '<your-channel-id>',
  theme: 'amio',
  lang: 'en',
  startOpened: false,
  wideButton: false,
  logoUrl: '<your-logo>'
})
</script>
2. Add Chatbot code to Shopify
To integrate the chatbot into your Shopify store, you’ll need to add custom JavaScript. This can be done directly in Shopify or through Google Tag Manager (GTM).
Add JavaScript Directly to Shopify
- Access Shopify Admin: Log in to your Shopify admin panel.
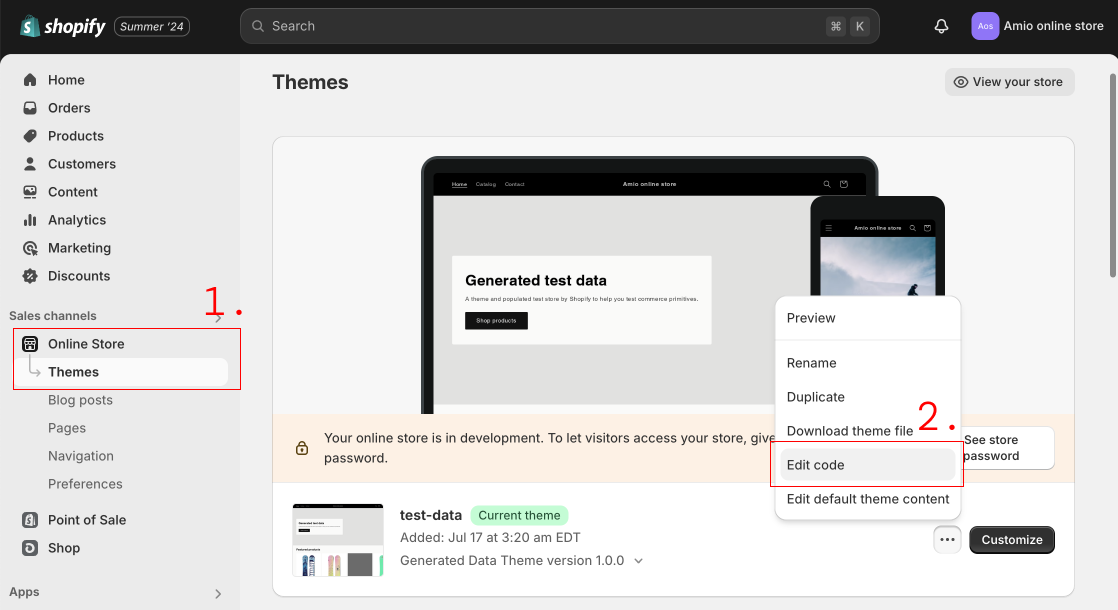
- Navigate to Online Store: Go to the 'Online Store' section and click on 'Themes'.
- Edit Code:
- Select 'Actions' (three dots) for your current theme and click on 'Edit Code'.
- Locate the
theme.liquidfile under the 'Layout' section.
- Insert the Amio JavaScript library just before the closing </head> tag (find more information about how to set Amio JavaScript at documentation
-
<script src="https://chat-widget.static-amio.com/static/amio-webchat-loader.min.js" type="text/javascript"></script>
-
- Insert your custom webchat JavaScript code just before the closing </body> tag.

- Save Changes: Click 'Save' to apply the changes to your theme.
Add JavaScript to Shopify through Google Tag Manager (GTM)
If you use GTM for any custom JavaScript code, follow these steps to put the Amio chatbot in your Shopify store:
- Create a New Tag in GTM:
- Open your GTM account and go to your container.
- Click on 'Tags' > 'New' and choose 'Tag Configuration'.
- Select 'Custom HTML' and paste your Amio chat widget script.
- Set Up a Trigger:
- Click on 'Triggering' and choose 'All Pages' to ensure the chatbot script loads on every page.
- Publish Changes:
- Click 'Submit' in GTM to publish the changes.
- Verify the setup by checking your Shopify store to see if the chatbot appears as expected.
Conclusion
This guide has led you through how to:
- create an e-commerce AI chatbot
- include products to its knowledge
- train it on your e-shop specifics
- deploy the chatbot to your Shopify store
Here are several further steps you should consider when running the chatbot:
- Monitoring: Regularly monitor the chatbot's performance to ensure it is meeting customer needs effectively.
- Improving the Chatbot:
- Update predefined answers based on common customer inquiries and feedback.
- Refine the GPT prompts to improve the chatbot’s responses.
Amio helped more than fifty e-shops to build, optimize, and run AI chatbots. Get our personalized assistance to build your one. ✌️
Book a 30-minute session where we will find out how AI bot can help you decrease call center costs, increase online conversion, and improve customer experience.
Book a demo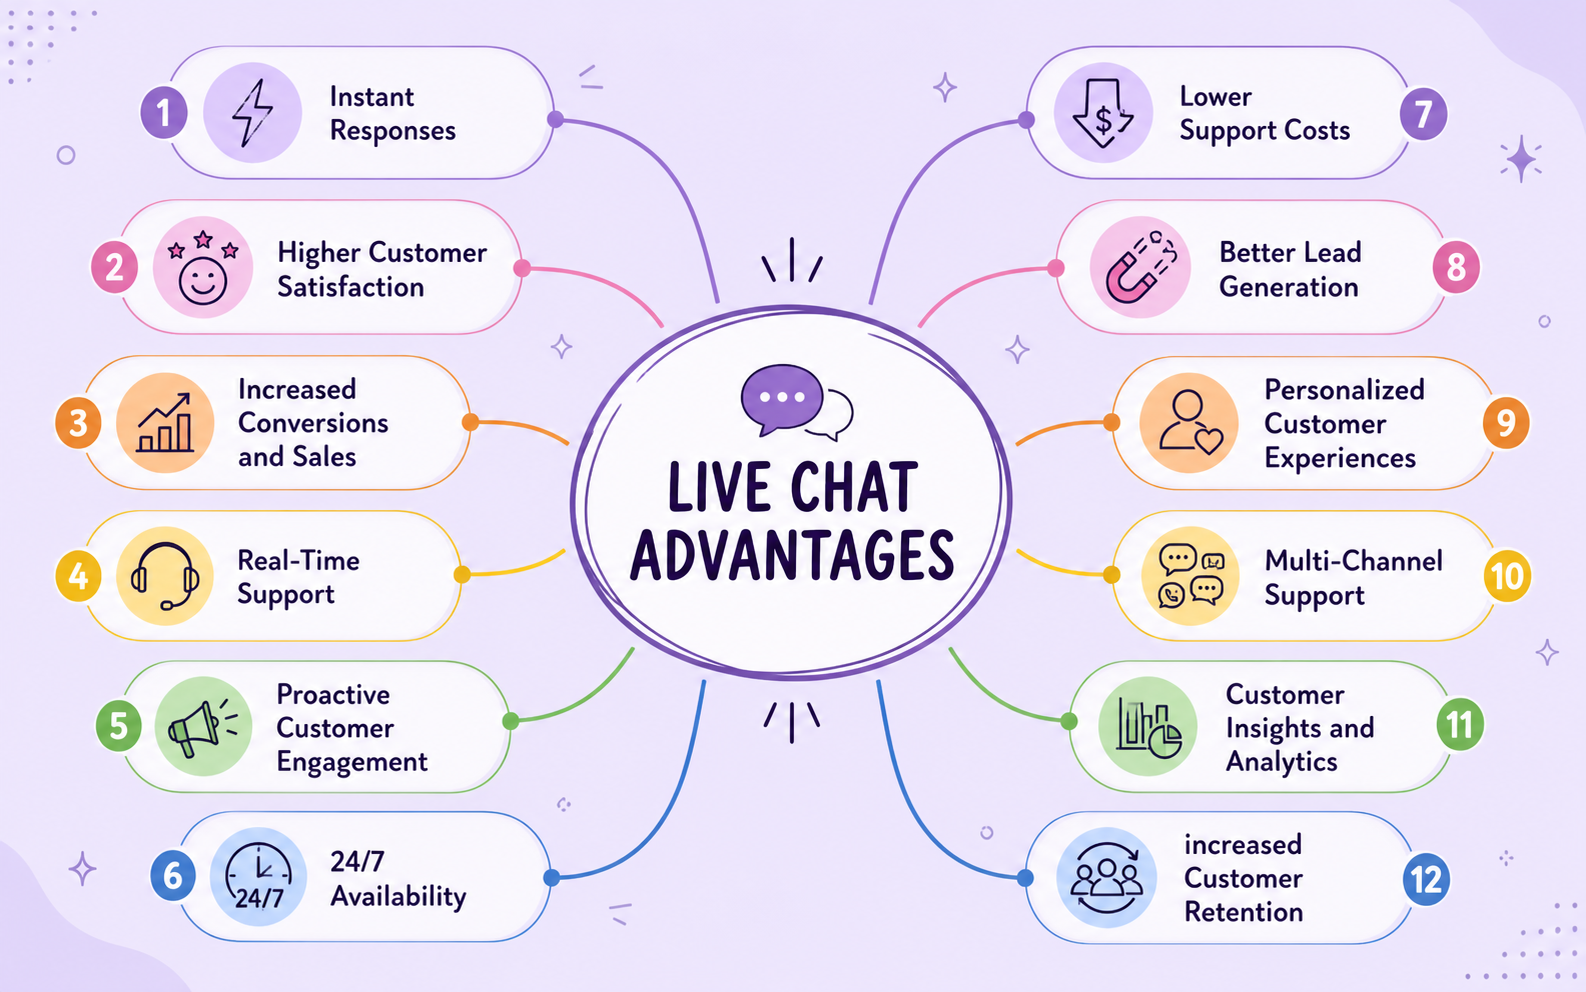


We understand your business on
Book a 30-min consultation session where we will discuss your support cost optimization potential, experience improvements, including our online conversion increase techniques
Request a demo